Monday, November 21, 2011

Weekend W.I.P. - Robots!

I've been working on a couple of robot designs to keep this guy company. 

'Robo-Claus'

Hopefully I'll have this first one finished in time for Christmas! I'm working on the colours now (so.. much.. cell-shading.. O_o)

'Robots Need Love Too'

This one is still a rough sketch, but he's been scanned and is waiting for his turn to be inked. Hang in there, little guy!

Saturday, November 5, 2011

Weekend WIP - West Coast Corvid


West Coast Corvid
"West Coast Corvid"
Acrylic on wood panel, 2011


It's the return of the Weekend Work-In-Progress!

This weekend I'll be showing you how 'West Coast Corvid' came together. There's not much to describe (since the steps are basically 1- sketch. 2- paint. 3- paint some more. 4- keep painting...), so I'll just let the pictures tell the story (such as it is).

Primed wood panel with gesso. Sketched the scene

Painted the sky. Played with some texture for the clouds.

Toned down the cloud texture. Painted the hills.
Played around with the paint on the closest hill to give it a bit of 'forest' texture.

Added some more detail to the hills. Painted the bird. 

And that's it! Everything went as smoothly as described, yes indeed... ;)

Here's a question for all you artists out there- what is your painting process like? Since I first learned to paint with watercolours, I tend to keep a lot of the same habits when I use acrylics (working from light to dark colours, for example). Do you have a system that you like to stick to, or do you tend towards slightly-controlled-chaos?


Friday, November 4, 2011

Find me on Facebook

Oh hello faithful readers!

Things are starting to pick up in the studio- lots of holiday gifts to work on...
I have a helper, though:

‎"What's this? A new surface for me to sleep on?"

I also wanted to let you know that I have finally set up a Facebook page for me & my art, if you like to like that sort of thing:
RavenHart Studio

More art & photos coming soon! :)

Wednesday, October 26, 2011

Operation: Facehugger

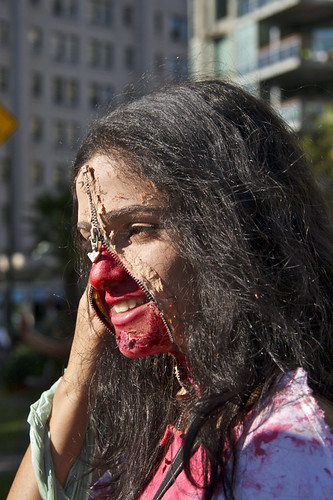
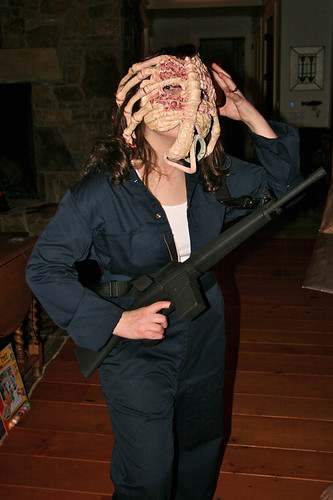
Ripley's been infected!

Since one Hallowe'en isn't enough for us, it's become a tradition in our group of friends to have a Christmas Eve costume party in honour of Al's birthday. The theme of the last one was 'Sci-Fi', which was an excellent choice! 
Being a big Alien fan, Julie's costume of choice was 'Facehugger Ripley'. She found an excellent jump suit, and all we needed to do was create a facehugger mask...

For a comfy fit, we started with a plaster base, like this:


Once that had completely dried, we hot-glued some fabric straps to the sides, and started applying the critter to the front. For this, we used a super lightweight modelling material (I think it was Crayola's Model Magic). Julie tackled the main body of the facehugger, and I sculpted some creepy grasping fingers.

I think those fingers move every time you look away...

Hello little guy!
And yes, its tail is a rubber snake.

After letting the facehugger harden overnight, it was time to add some colour! The first coat was Julie-skin-tone, which looked suitably creepy on this alien critter...

Be sure to use a wire core for all of your appendages- we got carried away
with the modelling clay and forgot to wire the base of the tail.  A little hot glue,
and we were back in business.

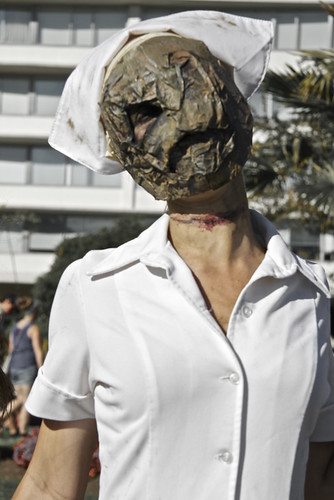
For the finishing touches, we added a sickly green layer, some splotchy red shadows, and covered the whole mask in a final coat of clear gloss acrylic varnish for that creepy moist & squidgy look.


Squidge, squidge, squidge...

Operation: Facehugger was a success!

A Girl and Her Facehugger

Now on to the next project...

Thursday, September 1, 2011

1000 Steampunk Creations

Ohai!

I'm in a book! :D
My first ever Steampunk attempt made it into Dr. Grymm's 1000 Steampunk Creations. What an honour! I guess this means I'm doing *something* right...

Thanks again to Al for helping out with photos!